
After finishing texturing the assets and assigning all those textures to material instances, the majority of work is done. The progress became more visible visually, but still couple of steps left. These can help to add more details, to finalize the look and feel of the scene and to add to the storytelling. Because one of my goals was to focus on storytelling, lighting and composition these final steps are as important as any other steps were done so far.
10. Creating and adding decals
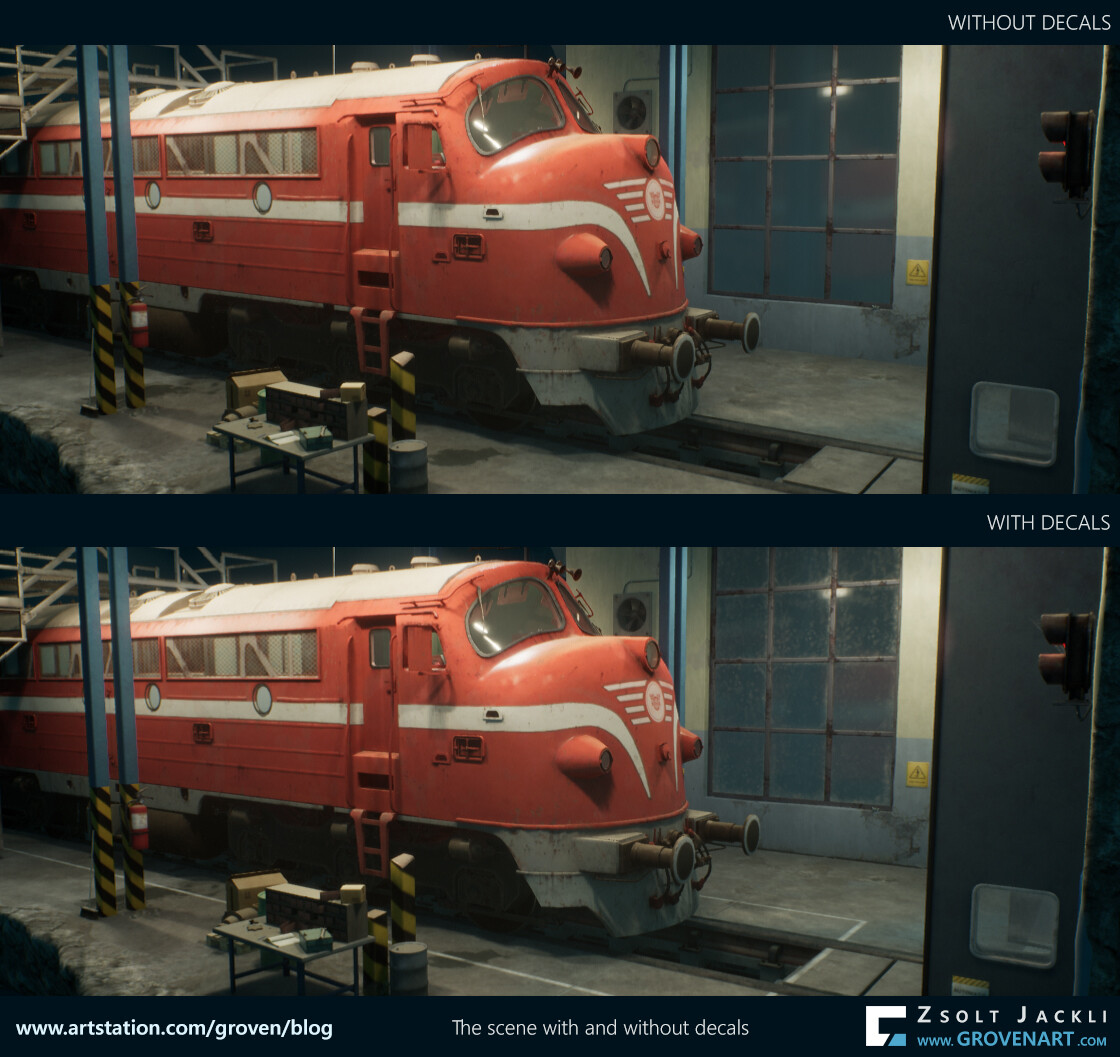
Decals are textures with the function to add more detail to the scene and break up the repetition. In Unreal you can use the decal actor to place them one by one but I went for another solution. I used mesh decals. I built planes, placed them in the scene and textured them. Using decals I could:
- add details to the edges and soften them near the windows, the doorframe and the tracks. Those were really sharp due to the fact I build the mesh with modular approach and beveling the edges would have caused visual bugs I wanted to avoid
- add cracks, marks, cobwebs, leaking, dirt
- add dirt to the glass surfaces
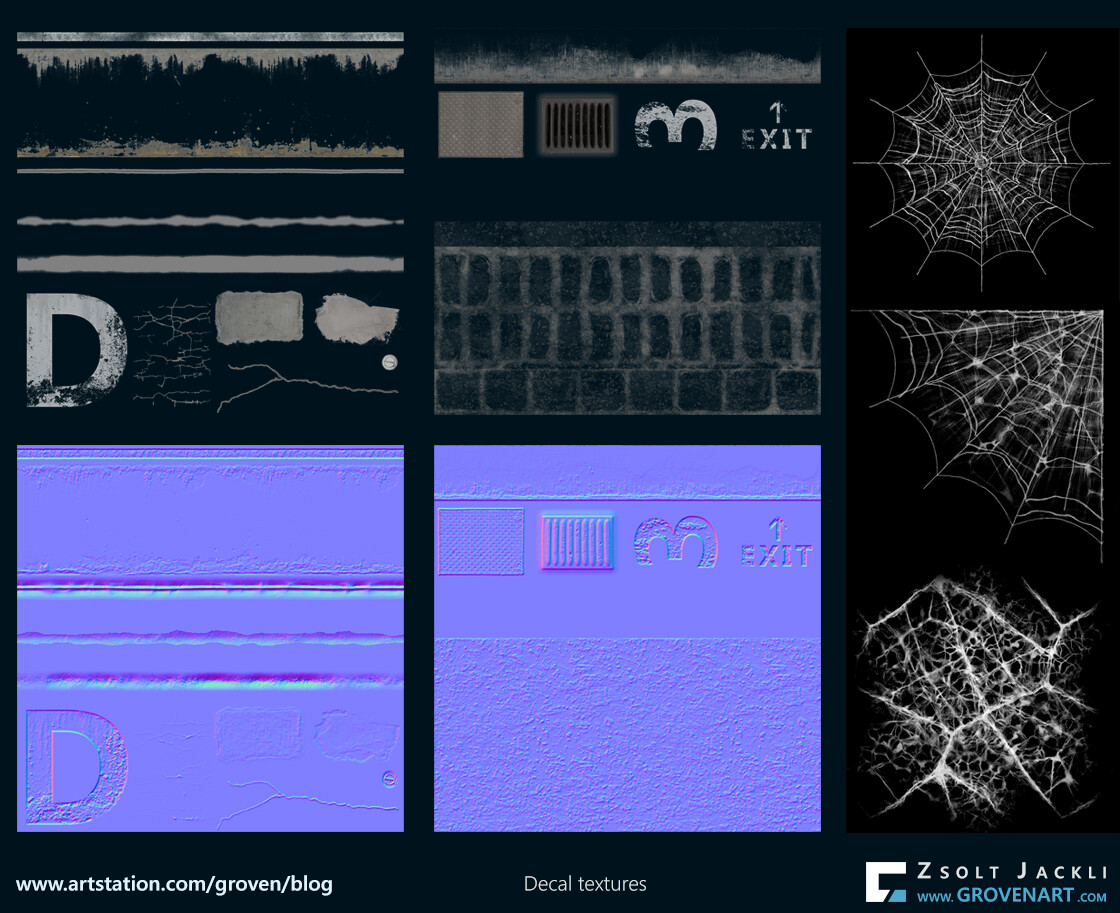
Because I used mesh decals I could optimize the UV and texture space they use. I ended up using three textures for all of them. To speed up the texturing process some of the textures were picked from textures.com and edited in Photoshop. The cobwebs were borrowed from a refrigerator asset made by Jonjo Hemmes which became available for free on Artstation a while ago. The rest like the edge details or the dirt on the windows were made in Substance Designer by me.
Important to mention that decals are great additions to a scene but they have a performance cost because it uses a translucent material with opacity texture. Also positioning and figuring out how big the decals should be that it look always good is also tricky. They were cases when the camera was a bit further away from the scene and the decals which were behind the wall got rendered on top of the wall mesh. The reason behind this in which order the engine renders them and the other objects in the scene. I had to play around with the size and position of the decals and in some cases I also had to delete some them to get rid of this a visual bug. I wouldn`t say I found a perfect solution for this, but it helped a lot. There is an another visual bug I run into which is easier to solve then the one I just mentioned. It happened the decals were rendered on top of an object no matter how close or far the camera was from the mesh. By default in every mesh the Receives decals option is enabled. After selecting the mesh in the Detail panel disabling this option can help to solve this issue.
11. Post processing
After the lighting, all materials, textures and decals were in place I started to fine tune the post process volume to get the look and feel I had in mind for the diorama. The post process can have a huge impact on the overall scene, so I tried to avoid to do extreme tweaking in its settings. Instead I did subtle adjustments here and there and building the effects on top of each other to get what I was aiming for.
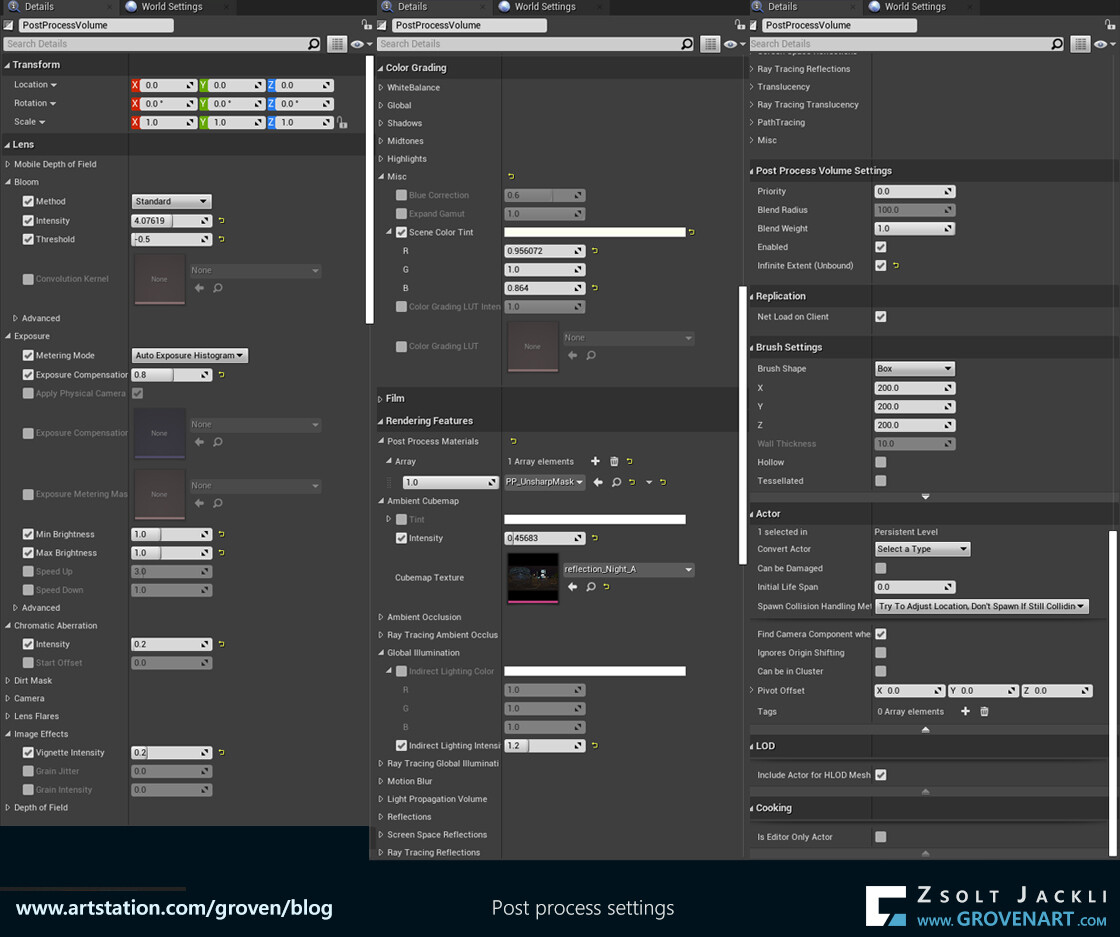
As you can see I adjusted only a few settings focusing on what I really need. Bloom, Exposure, Chromatic Aberration, Vignette effect, Scene color tint. It really depends on the scene but I saw these settings are often adjusted in many cases. I didn`t even use the LUT, a powerful post process effect because after couple of tests I realized the scene doesn`t need it. But there are three settings which proved to be really helpful next to the ones mentioned above. The scene itself is pretty dark so I needed to lighten it up a little bit more to make the details pop up and have something as reflection for metal surfaces. Playing around with the intensity of the Global illumination and adding an Ambient Cubemap (borrowed from the King Wash Landromat scene made by Clinton Crumpler) did the trick. The third settings I played with was the post process sharpening effect. In some cases the renders made in Unreal can be a bit washed out by default resulting loss of details. To get the details back adding this sharpening filter can improve the renders.
12. Making renders, videos
As one of my goal was to focus more on composition I set up couple of cameras at the very beginning of the project to see my progress and check things from different camera views. I used different composition techniques but the most frequently used one was the Rule of Thirds. My aim was to have a simple approach and set up with an object in focus while I show the diorama from different angles. Combination of the camera settings and placement adjustment along with the set dressing led to the final shots. As I progressed with the scene I added more cameras so at the end I could chose which camera I want to get the render from.
For the videos I used the Camera rig rail system in Unreal and recorded them in Level Sequencer. I edited and labeled the videos in Shotcut, a free video editing tool.
Check out the final renders and videos here.
13. Publication
The project is done, but still there is one more final step. Every step I`ve talked about so far was important for a reason or two. This step is important to showcase your knowledge and ideas and get a reaction from others how they feel about what you created. It takes some time to prepare the texts, images for different sites but needless to say publishing your work can bring opportunities or encounters in your way. So even though that it is not really part of the creative process like figuring out how to texture different objects that they harmonize in the scene, but it does worth it.
Closing words
Thank you for reading my posts about how this diorama was made. What I wrote down is my experience how I managed to do this project from start to finish. It depends on the size of the project and also varies by people how much time it takes to finish a project like this. For me it was an interesting, long and challenging journey. Along the way getting feedback from the community helped me to make the next step. My special thanks goes to Ryan Benno who at the end of the project gave me his support and I could finish it.
The workflow I followed and the steps I took to create this diorama is very similar how a project like this gets done in the industry. I`ve seen other artists followed similar steps but in every case their approach was also slightly different. I hope you found something new while reading my posts and was helpful in your project.
Stay safe!