
It has been a while. Many things happened in the last 2 months on my side and couldn`t really find the time to continue the blog. Sorry for keep you waiting, but finally here is the next post. At the end of the previous post I gave a sneak peak of one of the materials I made for this scene. If you think I`m going to talk about materials, then you`re right. So without further due let`s dive into this topic!
When it comes to material creation the first question you should answer is "What kind of materials do I need to create for this particular project I`m working on?" The answer is: it depends on the project, on your goals and what you need the material for. With other words, the material should be aligned with what you are aiming for, therefore it is capable of fulfilling its function in the given scenario by giving the expected results. If you identify its function early on you can make a plan based on this and execute it. For instance I wanted to use vertex paint material for large surfaces such as the wall and the floor. For the wall I wanted to introduce a secondary color for the paint without using any textures. But later I came up with the idea that I also want to add puddles on the floor too using the vertex paint material. I had to think about it how to pull this off because puddles on the wall does not look believable and secondary color stipes on the floor looks also funny. I needed the material to be really flexible and be able to switch between materials or replace them if it was needed. So at the end after lot of try and error I managed to create a master material in which I blended together 4 different materials. I built in a switch to be able to swap the last material to water material. For the secondary paint I used Tor Frick`s approach with a slight modification to make it fit into the system. To make the material flexibility and reusable I exposed all the parameters I needed later for tweaking. I created a Material Instance of the Master Material and applied it to the surface and modify, tweak the parameters for my needs.
There are many good tutorials about how to make a vertex paint material in Unreal. I also showed in this post how my vertex paint material works in action. Therefore I`d avoid talking in more details about this type of materials. Instead I`m going to talk about how to create a material which can be used for almost all the assets in my scene.
Creating a material is a process itself as my brief explanation above shows. Basically you build a system. Therefore there are steps and certain logic you have to follow to build its structure. I`d advise not to compromise the system you want to build just for the sake of saving time. Later it can get really confusing when you have to deal with many assets like I did in this project. If you come up with a plan how the material should work, what is its purpose and you follow it, test it and iterate it it will give you an organized, efficient material at the end with a lot of flexibility and the possibility to be able to reuse it later in another project.
As I mentioned before it is important to test your textures and set up a basic material early on. As a first step better to keep the initial material setup rather simple (you just plug in the basic textures and nothing else). The reasons are: 1) you might not have a clear idea what functions you really want to add to the material at the beginning, 2) it is easier to iterate and add more functions to a simple setup than to a complex one.
Like in the case of the vertex paint material in this case as well I had to think about what the material should be capable of. To challenge myself I came up with the idea to create a master material which fits for all the assets in the scene. It was a bold plan. To build in all the functions I came up with in the material without making it too complicated was a tough nut to crack. At the end I could apply material instances referencing a single master material to 95% of the assets. The missing 5% (glass, vegetation, decals, vfx materials) needed their own master material mainly because they had to have different shading models (two sided foliage ) or blend modes (translucent) within the material.
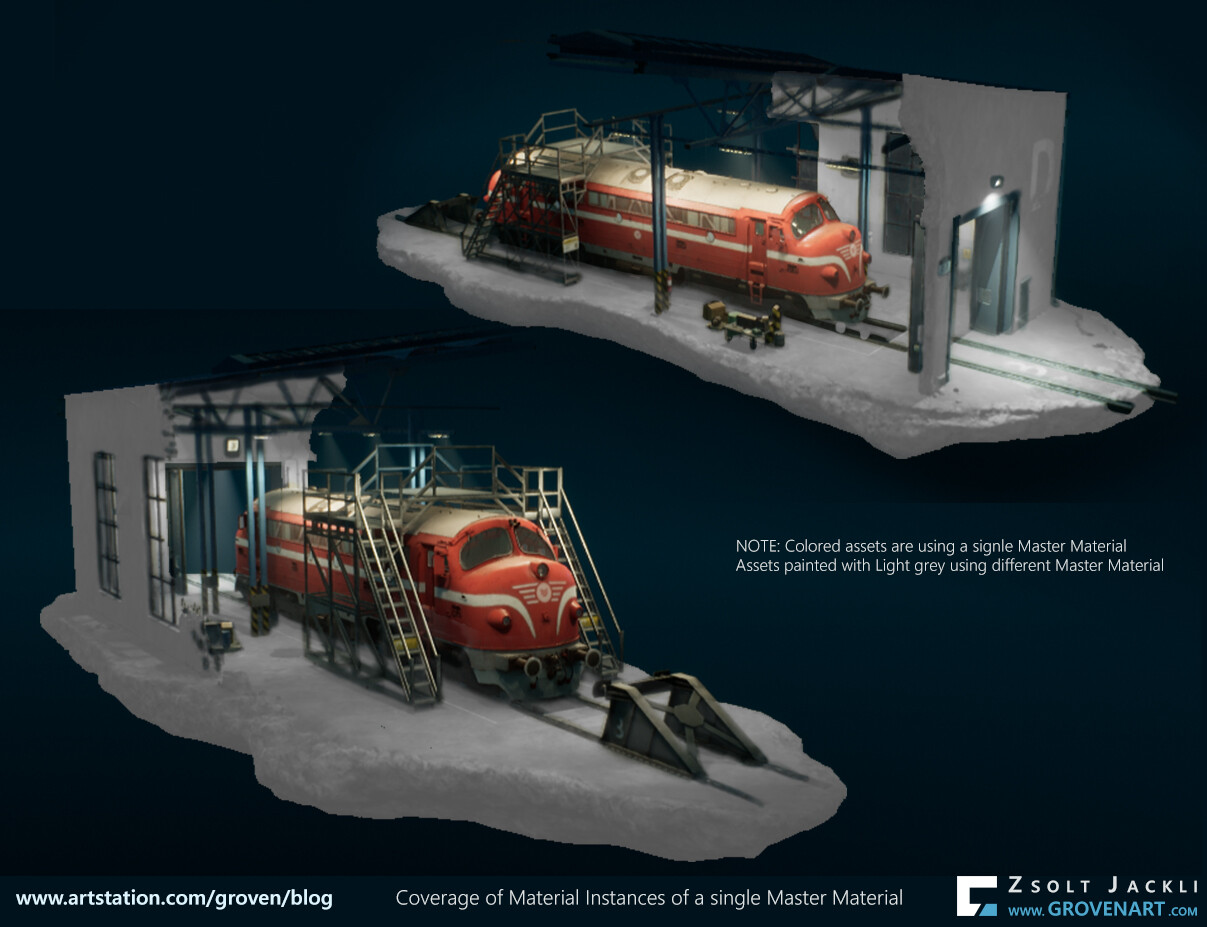
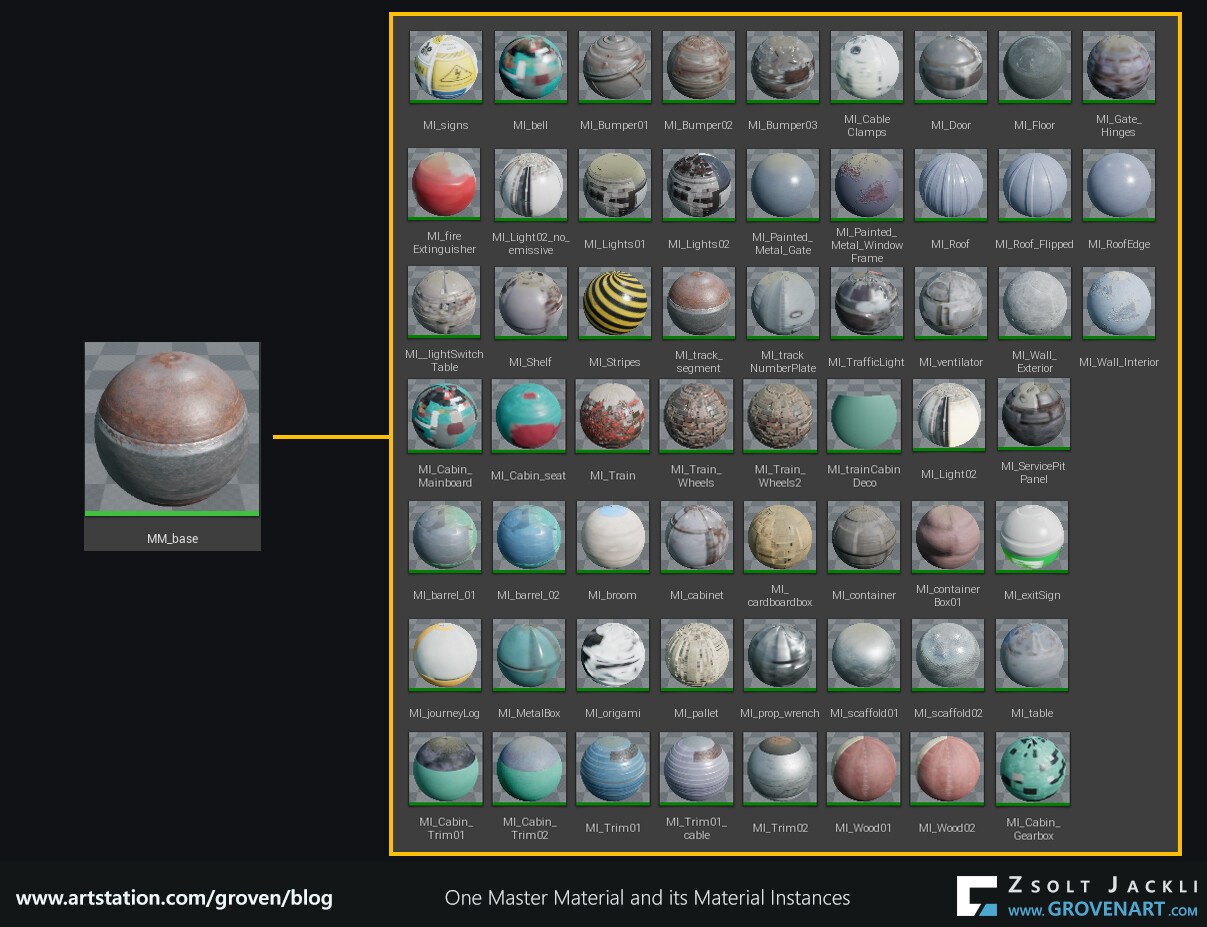
Advantage using this approach that a Master material can have as many Material Instances as you want. If you adjust something in the Master Material it will be applied to all its Material Instances. The picture below shows the number of Material Instances I used to get the coverage seen on the picture above.
As I said earlier you build a system and every system has a structure and follows a certain logic. The base of the structure was the albedo, roughness and normal textures because I used PBR workflow. To reach my goal I also followed a certain logic. Namely if each of every asset is textured the same way the same system can be applied on them. Simple, isn`t it? Therefore the way you create a material it also depends on how you approach texturing. The system - as the picture shows below- relies on the RMOE (Roughness, Metalness, AO, Emissive) texture. If I didn`t combine these together in one texture the structure would look like a bit different. To have a clean and organized material creating a group for each textures and adding parameters to the group was the way to go.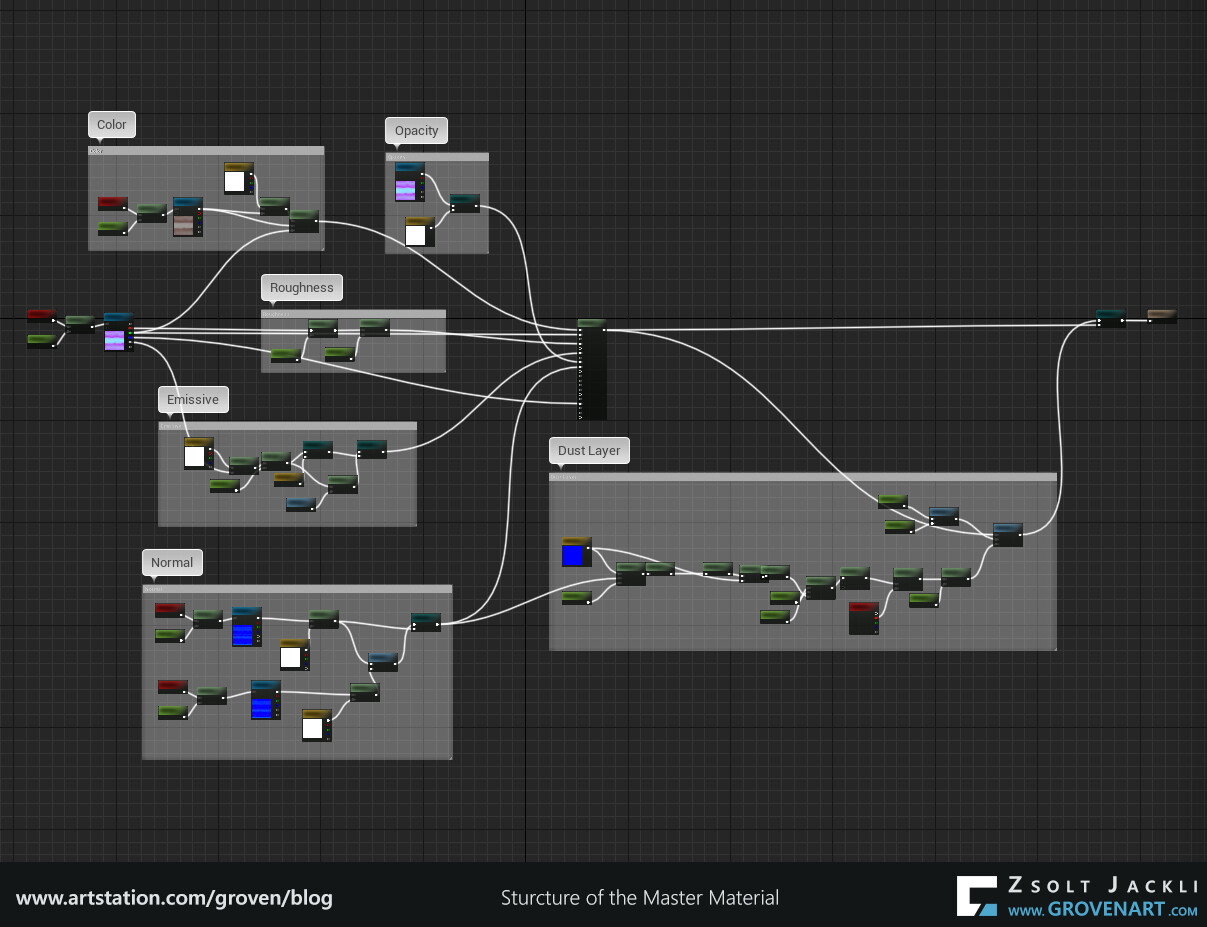
But how to decide what function or parameter add to each groups? Checking your references again or the story you want to tell with the scene, getting feedbacks from other artists can give you new ideas. Adding color tint, adjusting tiling or intensity, adding detailed normal map on top of the normal map are popular picks to enhance the material. I also added these to the master material and came handy in some cases. Furthermore I added Opacity texture so the assets using opacity (p.e. broom) can use this material. I named everything and organized them in groups so in the Material Instance window easy to understand the function of the parameter and what has effect on what.

The scene had a night lighting scenario and according to the story I came up with the train was waiting in an old depot. After researching how to make a randomized flickering effect I created a material function for this purpose and linked it to the master material. I put the flickering light outside and left all the lights on inside the depot. This way I could create a contrast in the lighting and in the mood because inside feels safe (lights are on) and outside is uncertain, uncharted (flickering light and dark). Here is the flickering light in action.
Dust is a very good visual tool to emphasize the pass of time and the fact that no one was around for a while. I did want to avoid to paint a dust layer manually for each of every asset because it would have taken too much time. Instead I researched the topic and found a way to use world aligned texture in a material function which will be projected on top of the object regardless how the object rotated. I combined this with the base textures inside the master material. If you make something like this for the first time it can be quite intimating and hard to digest. But there is a really good tutorial explaining how to create this.
Stay safe and see you next time!