
Finally after all the preparations and investigation let`s move to the next phase of the project which is:
8. First texture pass, master material setup in game engine
In this stage my goal is to create the base of the textures, create materials with parameters to be able tweak those in the engine real time and a basic look for the whole scene.
In my previous posts I shared screenshots of the scene. The scene might seem to be simple (it is in a way) but it is made of many objects. When I have to deal with more than 100 assets texturing can be really time-consuming. So here is how I find solution to speed up my workflow without sacrificing the quality:
- Track the progress of each asset
As I mentioned in my first post the project tracking file contains the list of assets. As you can see it on the image below it provides information about the asset creation process from start to finish. During the process of dealing with many assets it is easy to get lost. But this way I know how far I got with each asset and how much work still has to be done. It also contains additional information about which assets are using the same texture or how many pieces they were broken into to keep the texel density of the object.
- Know and set up the software you use
There are many ways to texture an asset. Due to the large number of assets I decided at the beginning of the project what software I use for what steps. For modeling 3dsMax, for creating a high poly version of the asset 3dsMax or Zbrush, for baking and texturing Substance Painter and/or Substance Designer. With each asset I follow the same steps and in each software I have my basic setup (hotkey, export template, smart material, etc.) to speed up my workflow. This way I use each software what it is best for to get the result I want.
Being familiar with the software is an important factor. For instance Substance Painter is using a different color space than Unreal by default. Therefore before I start texturing I have to set up the file properly in Painter to see how the asset would look in Unreal. If I hadn`t have known this then I would have got a different result from what I expected and would have had to spend time to investigate it.
- Put each asset in a texture category
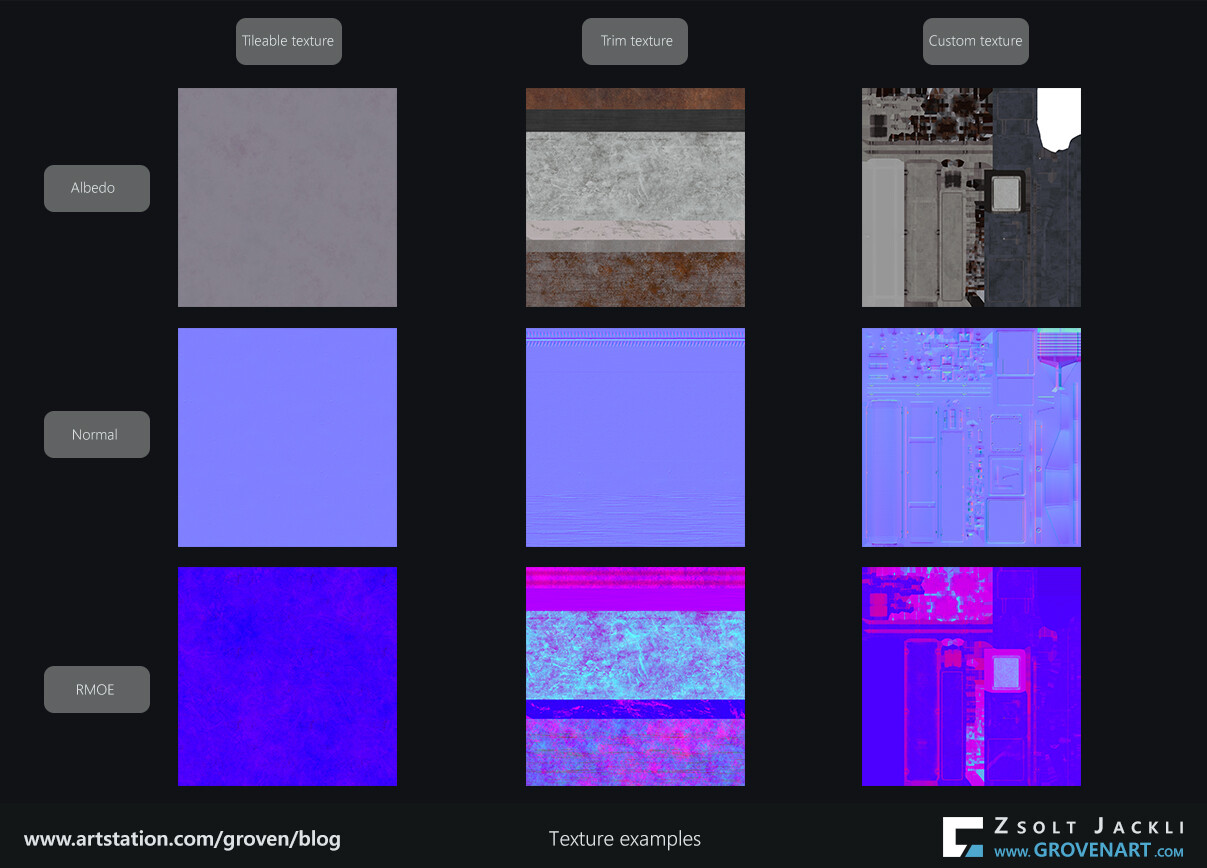
I put the textures into 4 categories. Tileable, trim, custom and decal textures. Each asset is different and when I did the UVs of them I was already thinking about how I want to texture them and which category they would fit in to save time. For tileable, trim and custom texture see the examples on the image below.
For instance there are big surfaces in the scene like the wall, the ground or the roof. For these the tileable textures are the best choice because they can cover them quickly and mixing them can break up the repetitiveness. Objects which can tile in one direction like the cable, the drain pipe or the reinforcement rod can use a trim texture to save texture space and reduce the number of textures I have to create. When the object is unique like the bumper or the hanging light and requires its own texture to be created then the next option is creating a custom texture for them. Finally the decals can help to break up big surfaces or the repetitiveness of the tileable textures. Their function is more like adding detail so at this point I do not have them yet.
Of course one object is not limited to use only one type of texture. In some cases it turned out that it is more efficient (and faster) to texture an asset using both trim and tileable texture instead of a single custom texture.
- Study and understand what you`re doing
Because I go for a PBR workflow not only I have to understand how PBR works but how to create the textures fitting into this workflow. Looking at references and analyzing how the textures and materials should be done is essential.
In this project everything needs to have an Albedo (color), Normal, RMOE (Roughness, Metalness, AO, Emissive) texture. When it is needed I make an Opacity texture separately. The roughness, metalness and AO are grayscale textures. In order to to save texture space and simplify the material I build in Unreal (meaning using less texture sampler) I combine them in one texture by placing the roughness in the red, the metalness in the green and the AO texture in the blue channel of the image. The alpha channel of the image is used by the Emissive texture.
- Use the software what it is best for
Each software has powerful features which can help to get the texturing done faster.
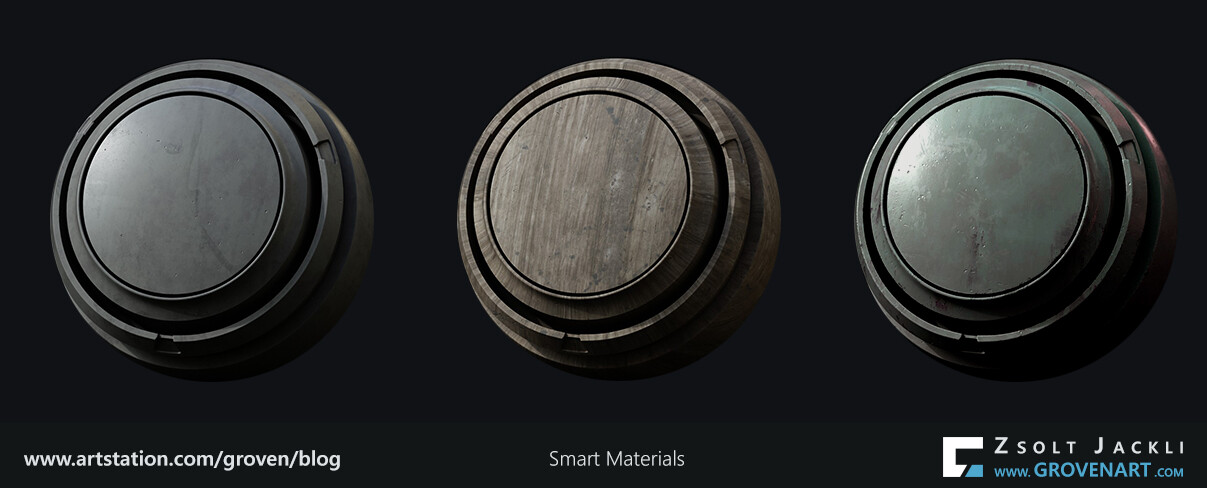
For instance the most used material in this project is painted metal, wood and plastic. So I created a Smart material in Substance Painter for each of them. When I create the base texture for an asset using one of these materials I just have to drop the material on the asset and adjust the settings of the layers to get a result which works as a base. This is a good starting point and enough for now. Tweaking, adjusting adding more details will be done in the second pass.
Let`s talk about the master material setup briefly.
Master material in Unreal are the materials containing all the setups, settings you want to be able to use the material for. For instance you can turn on and off a flickering effect with one click or adding a dust layer on top of your object. If parameters are exposed in the master material you can create an instance of that material (called Material Instance), assign it to a mesh and tweak the parameters fitting to that mesh. The power of Material Instances is you can create as many as you want and each can be tweaked separately not effecting each other. You have to create the master material only once and the Material Instances will reference it all the time because of the live connection between the two. I will show an example later.
To push this to the next level. Materials combined with vertex painting is a really powerful tool and gives more flexibility to create basically whatever you want. With other words, they give a lot of freedom to be able to mix together different materials. The video below demonstrates this tool in action. I blend together 4 different tileable materials. On top of that I introduce a secondary color layer which height I can controlled in the material instance.
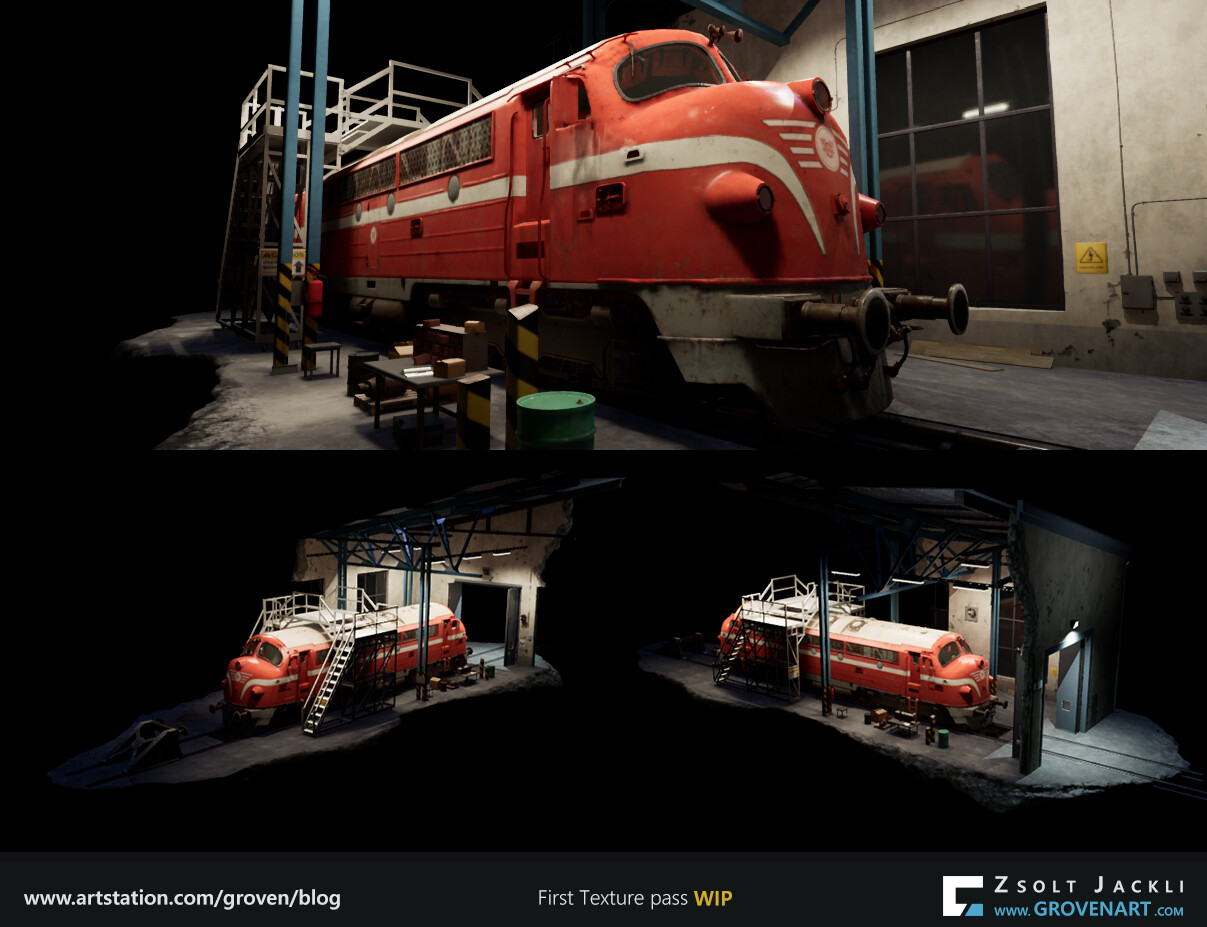
With these solutions I managed to cover the first texture pass of most of the assets relatively quickly. As the images below shows it starts to take shape but still there is lot to be done.
Stay safe and see you next time!